Table of Contents
ToggleVanilla-flavored cookies perfect for cutting into Valentine’s shapes.
Who doesn’t love a good cookie? This classic vanilla cookie recipe is the answer to all your baking dreams – simple ingredients, easy steps, and that warm, comforting vanilla flavour. Vanilla cookies are so versatile; whether you’re baking for a celebration, sharing with friends, or indulging on a quiet afternoon, they never disappoint.
This is the classic vanilla cookie recipe you’ll want to make again and again.
It’s easy, quick, and perfect for every occasion.
With just a few simple steps, you’ll be baking up a batch of these golden, soft cookies that are impossible to resist!
This recipe will walk you through each step, with tips on ingredients, measurements, and baking essentials to make sure your cookies turn out perfect every time.
If you’re looking for more inspiration with timeless treats, check out our collection of classic cookie recipes that are perfect for Valentine’s Day and beyond!
How to Make Perfect Homemade Vanilla Cookies Every Time
Ingredients for Vanilla Cookies
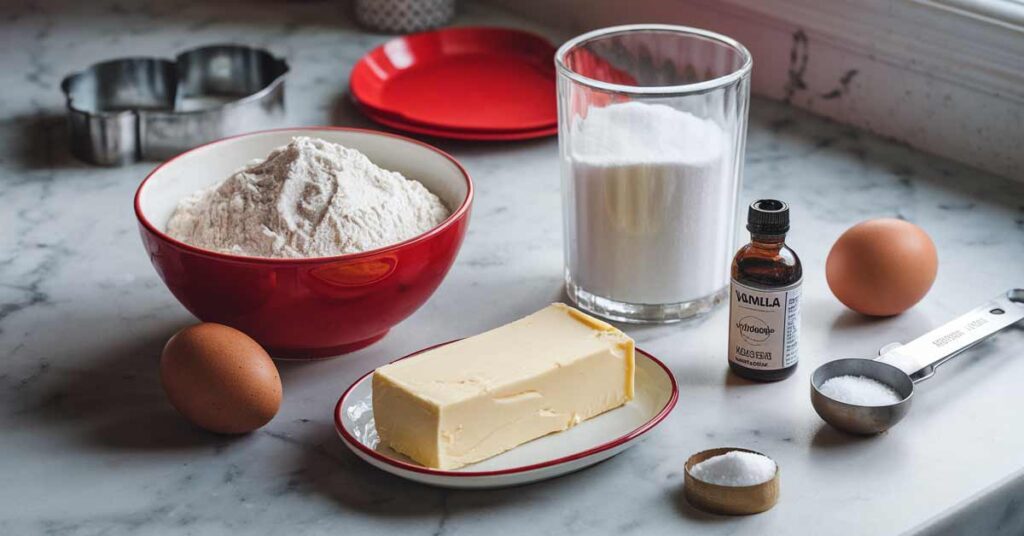
Creating perfect vanilla cookies starts with having the right ingredients in the right amounts. To make it easy, I’ve organised everything in a clear table, so you can follow along with ease. Each ingredient is listed with both metric (grams, ml) and imperial (cups, tablespoons) measurements to suit all preferences. I’ve also arranged them in the exact order they’ll be used in the recipe, so you can move smoothly from one step to the next.
| Ingredient | Metric | Imperial |
|---|---|---|
| Unsalted Butter | 115g | 1/2 cup |
| Granulated Sugar | 100g | 1/2 cup |
| Vanilla Extract | 5ml | 1 tsp |
| Large Egg | 1 | 1 |
| All-Purpose Flour | 180g | 1 1/2 cups |
| Baking Powder | 1g | 1/4 tsp |
| Salt | 1g | 1/4 tsp |
Each ingredient serves a purpose, from adding richness and flavour to helping your cookies rise and hold their shape. I’ve chosen unsalted butter to control the salt level in the recipe, while vanilla extract gives that iconic vanilla taste. The combination of all-purpose flour with a touch of baking powder creates the ideal cookie texture—soft yet slightly crisp around the edges.
With these ingredients laid out and easy to follow, you’re ready to jump into the recipe!
Measurements
Accurate measurements are key to creating consistent and delicious cookies every time. To make this recipe as versatile and user-friendly as possible, I’ve provided both weight and volume measurements for each ingredient. This way, whether you’re used to working with grams and millilitres or cups and tablespoons, you’ll have no trouble following along.
Why Both Options Matter
- Weight Measurements (grams, ml): For bakers who prefer precision, weight measurements are ideal. Using a kitchen scale ensures accuracy and consistency, which is especially important in baking where slight variations can alter the outcome.
- Volume Measurements (cups, tbsp): For those who prefer a more traditional approach, volume measurements work well and make the recipe feel more familiar and approachable, especially for home bakers.
Pro Tips for Measuring Ingredients
- Flour: When using cups, avoid scooping directly from the bag, as this packs too much flour. Instead, spoon the flour into your measuring cup, then level it off with a flat edge. This helps prevent dense cookies.
- Butter: Make sure your butter is at room temperature before measuring. It should be soft but not melted, which helps the ingredients blend smoothly.
- Sugar: Both brown and granulated sugar should be lightly packed for accurate volume measurements, ensuring the right balance of sweetness and texture.
- Vanilla Extract: While a teaspoon is standard, feel free to add a tiny bit more if you love a stronger vanilla flavour.
Having the right measurements gives you the flexibility to create these cookies with confidence, no matter what tools you have on hand. With this setup, you’re well on your way to mastering this traditional vanilla cookie recipe!
Ingredient Substitutions for Vanilla Cookies – Dairy-Free, Gluten-Free, and Low-Sugar Options

Baking should be enjoyable and accessible to everyone, so I’ve included a few smart substitutions that will let you tailor this vanilla cookie recipe to suit dietary needs, personal preferences, or simply what you have in your pantry. Whether you’re looking to make these cookies dairy-free, reduce the sugar, or add a unique flavour twist, this table has you covered.
| Ingredient | Substitute Option | Notes |
|---|---|---|
| Vanilla Extract | Almond Extract | Adds a slightly nutty flavour that complements the cookies beautifully. Use the same amount. |
| Lemon or Orange Zest | For a fresh, citrusy twist, add 1/2 tsp of zest per tsp of vanilla extract. | |
| Unsalted Butter | Margarine or Dairy-Free Butter | Great for a dairy-free option. Choose one with similar fat content for best texture. |
| Coconut Oil | Adds a mild coconut flavour; cookies may be slightly softer. Use in equal amounts. | |
| Granulated Sugar | Coconut Sugar | Provides a deeper, caramel-like flavour. Substitute 1:1 but note it darkens the cookies slightly. |
| Monk Fruit Sweetener | For a low-sugar version. Use a 1:1 sugar replacement. Be mindful, as sweetness levels vary. | |
| All-Purpose Flour | Gluten-Free Baking Blend | Use a 1:1 gluten-free baking mix for a gluten-free option, ensuring the blend contains xanthan gum or similar binders. |
| Whole Wheat Flour | For a slightly denser, more nutritious cookie, swap half the flour with whole wheat flour. | |
| Egg | Flaxseed Meal | Mix 1 tbsp flaxseed meal with 3 tbsp water; let sit for 5 minutes. A good vegan substitute. |
| Applesauce | Substitute 1/4 cup applesauce per egg for a slightly softer cookie. Adds a hint of apple flavour. |
Tips for Success with Substitutions
- Experiment in Small Batches: If you’re trying a substitution for the first time, it’s a good idea to bake a small batch to see how the texture and taste are affected.
- Understand Texture Changes: Some substitutions, like using coconut oil instead of butter, may slightly alter the texture of the cookies. Coconut oil can make cookies softer, while gluten-free flour might lead to a more crumbly result.
- Balance Flavours: When swapping vanilla extract for another flavour, like almond or citrus zest, consider how these flavours complement any icing or toppings you plan to use.
Using these substitutions allows you to customise this traidional vanilla cookie recipe to suit your needs while still enjoying a delicious batch of cookies.
Equipment Needed To Bake Vanilla Cookies

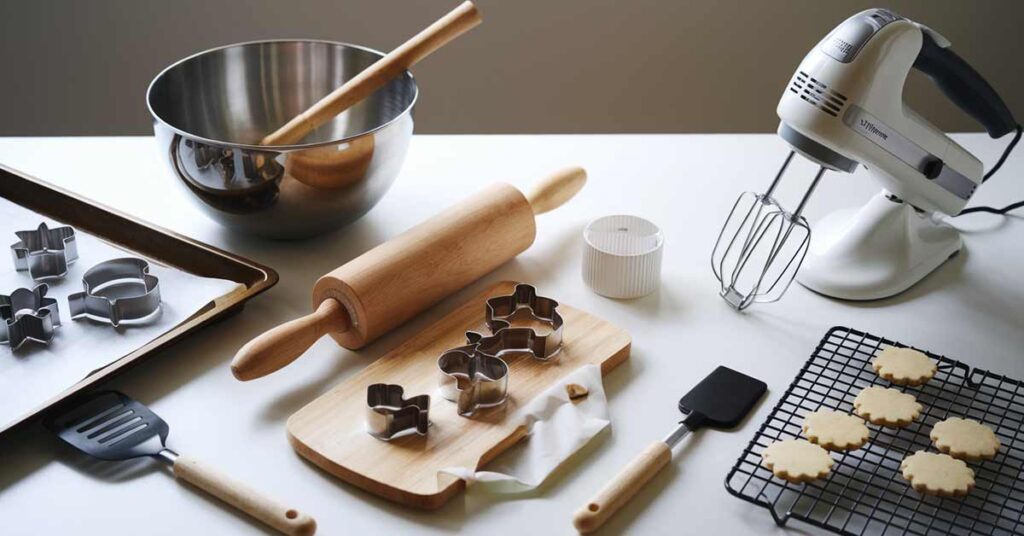
To make the most of this classic vanilla cookie recipe, having the right tools on hand can make the process smoother and help you achieve professional results. Here’s a list of essential equipment, with tips on how each tool contributes to the perfect cookie.
| Tool | Purpose and Tips |
|---|---|
| Mixing Bowls | A set of medium and large bowls is ideal for mixing wet and dry ingredients separately. A large mixing bowl helps prevent spills, making it easier to cream butter and sugar. |
| Hand Mixer or Stand Mixer | These tools ensure that the butter, sugar, and vanilla are perfectly creamed, giving the cookies a light, fluffy texture. If using a stand mixer, the paddle attachment works best. |
| Rolling Pin | Essential for rolling out the dough to a consistent thickness. A non-stick or adjustable rolling pin makes this step easier, especially for cutout cookies that need even thickness for uniform baking. |
| Baking Mats or Parchment Paper | Using a baking mat or parchment paper on your baking sheets prevents sticking, keeps cookies from spreading too much, and makes cleanup easy. |
| Cookie Cutters | For perfect shapes every time! Choose cutters in various shapes and sizes for different occasions. Metal cookie cutters are more precise than plastic ones and can help make those festive shapes crisp and clean. |
| Baking Sheets | Heavy-duty, non-warping baking sheets ensure even heat distribution, preventing cookies from burning or spreading unevenly. It’s ideal to have two sheets so you can alternate while one cools. |
| Spatula or Dough Scraper | Helps lift and transfer cookies from the cutting surface to the baking sheet without distorting their shapes. A spatula with a thin, flexible edge works best for delicate shapes. |
| Cooling Racks | Allow cookies to cool evenly and quickly, preserving their texture. By raising the cookies off the countertop, cooling racks prevent overbaking from residual heat on the baking sheet. |
Pro Tips for Using Baking Equipment
- Rolling Dough Evenly: When using a rolling pin, roll dough between two sheets of parchment paper. This keeps the dough smooth and prevents sticking without needing extra flour, which could dry out the cookies.
- Choosing the Right Cutters: For a classic look, round or heart-shaped cutters work wonderfully. If you’re feeling creative, seasonal shapes like stars or trees are fun options.
- Preventing Cookie Spread: Pre-chill your baking sheets before placing cutout cookies on them. Cold baking sheets help the cookies hold their shape better and bake more evenly.
With this equipment, baking up a batch of cookies from this vanilla cookie recipe will feel effortless and enjoyable. These tools ensure every cookie comes out with the perfect texture and shape, ready for decorating or enjoying plain!
How To Bake Traditional Vanilla Cookies
Making these cookies is a straightforward process that’s perfect for both new and seasoned bakers. Follow these step-by-step instructions for flawless cookies every time.
- Preheat the Oven: Set your oven to 180°C (350°F) and line two baking sheets with parchment paper. Preheating the oven ensures that your cookies bake evenly once they’re in.
- Prepare Ingredients: Take the butter out a bit early so it softens to room temperature. This will make creaming it with the sugar easier and will give your cookies a tender texture.
- Cream Butter and Sugar: In a large mixing bowl, use a hand mixer or stand mixer to cream together the butter and sugar on medium speed until light and fluffy (about 2–3 minutes). Creaming introduces air, making cookies lighter and fluffier.
- Add Vanilla Extract and Egg: Add the vanilla extract and the egg to the butter mixture. Beat until everything is well combined and smooth. The vanilla will give a rich aroma and add depth to the flavour.
- Combine Dry Ingredients: In a separate bowl, whisk together the flour, baking powder, and salt. This step ensures the leavening agent is evenly distributed for uniform rising.
- Mix Dry and Wet Ingredients: Gradually add the dry ingredients to the butter mixture, mixing at low speed until a dough forms. Avoid overmixing, as this can make the cookies tough rather than tender.
- Chill the Dough: Wrap the dough in plastic wrap and refrigerate for about 15–30 minutes. Chilling helps prevent the cookies from spreading too much while baking, so they hold their shape better.
- Roll Out the Dough: Place the chilled dough between two sheets of parchment paper and use a rolling pin to roll it out to about 1/4 inch (0.6 cm) thick. Rolling between parchment paper keeps the dough smooth and avoids the need for extra flour.
- Cut Out Shapes: Using your favourite cookie cutters, cut shapes from the dough and transfer them to the prepared baking sheets. Leave about 1 inch (2.5 cm) between each cookie to allow for slight spreading.
- Bake the Cookies: Bake in the preheated oven for 8–10 minutes, or until the edges are just starting to turn golden. Keep an eye on them – overbaking can make the cookies too crunchy rather than soft.
- Cool on a Wire Rack: Remove cookies from the oven and allow them to cool on the baking sheet for a minute or two. Then, transfer them to a wire rack to cool completely. Cooling on a rack keeps the cookies from becoming soggy on the bottom.
- Decorate (Optional): Once completely cool, feel free to decorate your cookies with icing, sprinkles, or a dusting of powdered sugar. These cookies are also delicious plain, showcasing the classic vanilla flavour.
Pro Tips for Perfect Cookies
- Uniform Thickness: Use rolling pin guides or two same-sized sticks on either side of the dough to ensure an even thickness, which helps the cookies bake uniformly.
- Avoid Sticking: Chilled dough is less sticky and easier to cut cleanly with cookie cutters, which helps maintain the shape of your cookies.
- Storage: These cookies can be stored in an airtight container for up to a week, keeping them fresh and ready for any occasion.
Following these steps, you’ll have a batch of perfect cookies from this classic vanilla cookie recipe, ready to enjoy or share.
FAQs: About Classic Vanilla Cookies – Tips, Storage, and Substitutions
Here’s a helpful FAQ section covering common questions and concerns about making this classic vanilla cookie recipe. Whether you’re curious about making the dough ahead, preventing cookies from spreading, or alternatives to vanilla extract, we’ve got you covered!
Can I make the dough ahead of time?
Yes! This dough is perfect for prepping in advance. You can make it up to 2 days ahead and store it in the refrigerator, tightly wrapped in plastic wrap. If you need to keep it longer, you can freeze the dough (see details below). When you’re ready to bake, let the chilled dough sit at room temperature for a few minutes to soften slightly before rolling.
How do I prevent cookies from spreading?
Preventing spread is all about keeping the dough cool and using the right amount of flour. Here are some tips:
- Chill the Dough: After making the dough, refrigerate it for at least 15–30 minutes before rolling and cutting. Cold dough holds its shape better.
- Use Parchment or Baking Mats: Baking on parchment paper or a silicone baking mat can reduce spread.
- Measure Carefully: Ensure you’re using the exact amounts of butter and sugar, as extra fat or sugar can cause more spreading.
How should I store these cookies?
To keep your cookies fresh, store them in an airtight container at room temperature. They should stay soft and delicious for up to a week. If you’re in a humid area, place a small sheet of parchment paper between cookie layers to prevent them from sticking together.
Can I freeze the dough or baked cookies?
Absolutely! Here’s how:
- Freezing Dough: After making the dough, wrap it tightly in plastic wrap and place it in a freezer-safe bag or container. It can be frozen for up to 3 months. When ready to use, thaw it in the fridge overnight, then proceed with rolling and cutting.
- Freezing Baked Cookies: Place cooled cookies in a single layer on a baking sheet and freeze until solid, then transfer them to an airtight container with parchment paper between layers. They can be frozen for up to 2 months. Thaw at room temperature before serving.
Do cookies really need vanilla extract?
Yes, vanilla extract is a key ingredient in vanilla cookies, providing a warm, rich flavour that enhances the sweetness of the cookies. Without it, the cookies may taste a bit flat or bland. If you don’t have vanilla extract on hand, consider using a substitute like almond extract (use half the amount) or even citrus zest for a new twist.
What are vanilla cookies made of?
Vanilla cookies are made from basic baking ingredients: butter, sugar, flour, eggs, and vanilla extract. The butter adds richness, the sugar sweetens, and the vanilla extract gives that iconic flavour. Baking powder or baking soda may also be included to help the cookies rise slightly, and salt is usually added to balance the sweetness.
What happens if I skip vanilla extract?
If you skip the vanilla extract, the cookies will still bake fine, but they won’t have that signature vanilla flavour. The sweetness will be there, but you’ll miss out on the depth and aroma vanilla adds. If you must skip it, try adding a pinch of cinnamon or a splash of almond extract for a different flavour profile.
Can I use vanilla essence instead of vanilla extract?
Yes, you can use vanilla essence as a substitute for vanilla extract. However, keep in mind that essence is often artificially flavoured and may not have the same depth of flavour as pure extract. If you’re using essence, you may need to add a little extra to achieve the desired flavour intensity.
Previous Article
Classic Chocolate Chip Cookie Recipe for Valentine’s Day
Next Article
Classic Gingerbread Cookie Recipe: A Sweet Valentine’s Day Treat
Related Posts
- Cookies Drizzled with Chocolate: Simple Tips for a Decadent Look
- Champagne Risotto with Parmesan for a Romantic Dinner
- Fondant Icing Decorating Ideas: Craft Beautiful Valentine’s Day Cookies
- Acts of Service: Mastering the Love Language for an Unforgettable Valentine’s Day
- First Date Tips: Master the Art of Memorable Encounters
- Sophisticated Valentine’s Day Decor Ideas to Elevate Your Celebration


